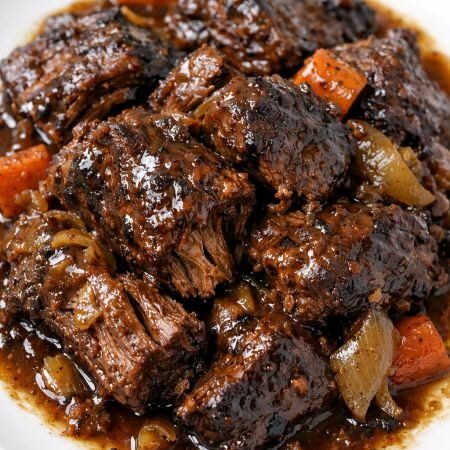
There is a moment, just before the lid comes off, when the kitchen holds its breath. The oven has been sighing warmth for hours, and through the small window of the Dutch oven you can see the beef settled into its dark, glossy bath like a stone in a quiet river. Pot Roast Photography is not a dish named for a camera, though it earns the name. It is named for the way a good pot roast makes everyone at the table stop, lean in, and reach for their phones.
Advertisements1
The technique is old, older than the cameras we point at it. Braising was born in peasant kitchens where tough cuts and long hours were the only currency available. The method has not changed much since: sear, simmer, wait. What has changed is our need to capture the result. This recipe gives you a roast with a lacquered, mahogany crust and vegetables that surrender to a spoon, the kind of plate that photographs itself.
I have made this roast in a rented cabin with a warped oven door and in my own kitchen on a Tuesday. It forgives. It waits. It rewards patience with a gravy you will want to drink from the pan. Wander slowly through the steps below, and let the house fill with the smell of something worth remembering.
Why You'll Love This Recipe
About the Ingredients
1 boneless beef chuck roast, 3.5 to 4 lb (1.6 to 1.8 kg), tied with kitchen twine
Chuck is the ideal cut because its heavy marbling melts into the sauce; if unavailable, use beef short ribs or a 7-bone pot roast. Ask your butcher to tie it so it holds its shape during the long braise.
2 tbsp (30 ml) neutral oil, such as grapeseed or canola
A high-smoke-point oil lets you sear hard without burning; olive oil works in a pinch but keep the heat moderate. Do not use butter alone for the sear, as it will scorch before the crust forms.
2 tsp (12 g) kosher salt, plus more to taste
Diamond Crystal kosher salt dissolves faster and seasons more evenly than table salt; if using fine sea salt, reduce to 1 1/2 tsp. Season the roast at least 40 minutes ahead so the salt penetrates.
1 tsp (3 g) freshly ground black pepper
Fresh-cracked pepper blooms in the hot pan; pre-ground loses its oils within weeks. A coarse grind gives better crust texture than fine dust.
2 large yellow onions, cut into 1-inch wedges
Yellow onions break down into sweetness; white onions are sharper, and red onions will tint the gravy pink. Keep the root end intact so the wedges hold together.
6 medium carrots, peeled and cut into 2-inch lengths
Look for carrots with tight, un cracked skin; older carrots turn woody in a long braise. Parsnips can stand in for half the carrots for a peppery note.
1.5 lb (680 g) baby Yukon Gold potatoes, halved if large
Waxy potatoes hold their shape where russets would dissolve; if using russets, add them only for the final 45 minutes. Leave the skins on for a rustic look and better texture.
4 garlic cloves, smashed and peeled
Smashed garlic releases sweetness slowly without turning bitter; do not mince it, or it will burn during the sear. Garlic scapes or a teaspoon of garlic paste work as a substitute.
2 tbsp (30 g) tomato paste
Tomato paste adds body and a subtle acidity that balances the fat; sun-dried tomato paste is a fine swap. Cook it for a full minute to caramelize away the tinny edge.
1 cup (240 ml) dry red wine, such as Cabernet Sauvignon or Cotes du Rhone
The wine should be something you would drink; cooking wine is salted and will wreck the sauce. For alcohol-free, use 1 cup beef broth plus 1 tbsp red wine vinegar.
2 cups (480 ml) low-sodium beef broth, plus more as needed
Low-sodium lets you control the final seasoning; if using regular broth, skip the added salt until the end. Homemade beef stock will make the gravy noticeably richer.
3 sprigs fresh thyme and 1 bay leaf
Tie them with twine for easy retrieval; dried thyme works at half the quantity. Rosemary can overwhelm a long braise, so use it sparingly if at all.
Tips & Tricks
Do not skip the sear
A hard sear at 450 F (230 C) for 4 minutes per side builds the Maillard crust that gives the gravy its color and depth; the beef should be deeply browned, not gray.
Keep the liquid at a bare simmer
If the braise bubbles hard, the meat turns stringy; you want lazy bubbles at the edges, about 300 F (150 C) in the pot.
Cool before slicing
Resting the roast 20 minutes lets the juices redistribute; cutting too soon leaves you with dry slices and a flooded board.
Season the gravy last
The braising liquid reduces and concentrates, so taste after skimming and add salt only then.
Pro Tips
Step-by-Step Instructions
1. Dry and season the roast
Pat the chuck roast completely dry with paper towels, then rub it all over with 2 tsp kosher salt and 1 tsp black pepper. Let it sit at room temperature for 30 minutes while you prep the vegetables; this helps it cook evenly.
2. Sear until deeply browned
Heat 2 tbsp oil in a Dutch oven over medium-high heat until it shimmers, about 350 F (175 C). Sear the roast 4 minutes per side until a dark mahogany crust forms, then transfer it to a plate.
3. Soften the aromatics
Lower the heat to medium, add the onions and garlic, and cook 5 minutes until the onions turn translucent and the edges begin to caramelize. Stir in the tomato paste and cook 1 minute until it darkens and smells sweet.
4. Deglaze with wine
Pour in the red wine and scrape the browned bits from the bottom with a wooden spoon. Simmer 3 minutes until the wine reduces by half and no longer smells of alcohol.
5. Build the braise
Return the roast to the pot and add the beef broth, thyme, and bay leaf; the liquid should come halfway up the meat. Bring to a bare simmer, about 300 F (150 C), then cover and transfer to a 325 F (165 C) oven.
6. Braise low and slow
Cook covered for 2 hours 30 minutes, until the beef reaches 200 F (93 C) internal temperature and a fork slides in with almost no resistance. Add the carrots and potatoes during the last 45 minutes so they hold their shape.
7. Glaze and rest
Uncover, raise the oven to 425 F (220 C), and roast 15 minutes until the surface is burnished and the sauce bubbles at the edges. Rest the roast 20 minutes on a board before slicing against the grain.
8. Finish the gravy
Strain the pan juices, skim the fat, and simmer 5 minutes until the gravy coats the back of a spoon. Whisk in cold butter off the heat, taste for salt, and spoon over the sliced roast.
Delicious Variations
Mushroom Red Wine Pot Roast
Add 8 oz sliced cremini mushrooms with the onions and use an extra half cup of broth for an earthier, deeper gravy.
Sunday Supper with Root Vegetables
Swap the potatoes for parsnips, turnips, and a small rutabaga, adding them at the 60-minute mark for a sweeter, more rustic braise.
Smoky Chipotle Pot Roast
Stir 2 minced chipotles in adobo into the tomato paste stage and finish with a squeeze of lime for a gentle heat that cuts the richness.
How to Store Pot Roast Photography
Refrigerator
Store the sliced roast and vegetables submerged in gravy in an airtight container for up to 4 days; the flavor deepens overnight.
Freezer
Freeze the roast and gravy together in a freezer-safe container for up to 3 months; thaw overnight in the refrigerator before reheating.
Reheating
Warm gently in a covered pot over low heat with a splash of broth, about 15 minutes, until the beef reaches 165 F (74 C); avoid the microwave, which toughens the meat.
Frequently Asked Questions
Q: What is the best cut of beef for pot roast?
Chuck roast is the best cut because its marbling and connective tissue break down into gelatin during a long braise. Look for a 3.5 to 4 lb roast with good white flecks throughout the meat.
Q: How long should I cook a 3.5 lb pot roast?
A 3.5 lb chuck roast needs about 2 hours 30 minutes covered at 325 F (165 C), plus 15 minutes uncovered at 425 F (220 C) to glaze. The meat is done when it reaches 200 F (93 C) internally and shreds easily with a fork.
Q: Why did my pot roast turn out dry?
Pot roast turns dry when it is undercooked or cooked at too high a temperature, causing the muscle fibers to squeeze out moisture before the collagen melts. Keep the liquid at a bare simmer and cook until the beef reaches 200 F (93 C), not a minute less.
Q: Can I make pot roast in a slow cooker instead of the oven?
Yes, a slow cooker works well; sear the meat on the stovetop first, then cook on low for 8 to 9 hours or high for 4 to 5 hours. Add the carrots and potatoes in the last 2 hours on low so they do not turn to mush.
Q: Do I have to use wine in pot roast?
No, wine is optional; replace it with an equal amount of beef broth plus 1 tbsp red wine vinegar for acidity. The vinegar mimics the brightness the wine would add without any alcohol.
Make this pot roast on a gray afternoon when the light is soft and the house feels too quiet. Set the pot in the oven, let the smell wander through the rooms, and when the lid comes off, take the picture. Then put the phone down and eat. Wander slowly.
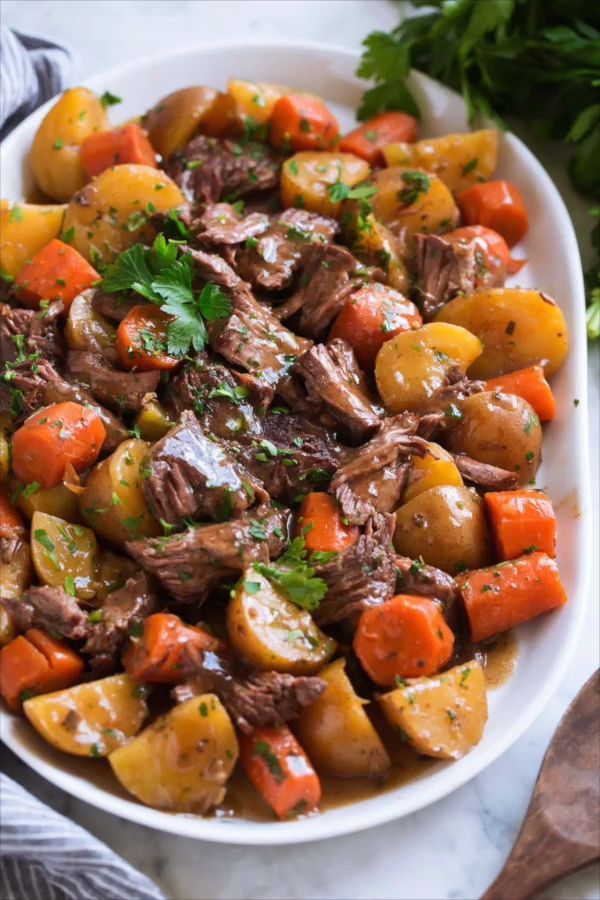
Pot Roast Photography
Pot Roast Photography is a fork-tender braised beef dinner that looks as rich as it tastes, with deep mahogany glaze and silky root vegetables.
🧂 Ingredients
- 1 boneless beef chuck roast, 3.5 to 4 lb (1.6 to 1.8 kg), tied with kitchen twine
- 2 tbsp (30 ml) neutral oil, such as grapeseed or canola
- 2 tsp (12 g) kosher salt, plus more to taste
- 1 tsp (3 g) freshly ground black pepper
- 2 large yellow onions, cut into 1-inch wedges
- 6 medium carrots, peeled and cut into 2-inch lengths
- 1.5 lb (680 g) baby Yukon Gold potatoes, halved if large
- 4 garlic cloves, smashed and peeled
- 2 tbsp (30 g) tomato paste
- 1 cup (240 ml) dry red wine, such as Cabernet Sauvignon or Cotes du Rhone
- 2 cups (480 ml) low-sodium beef broth, plus more as needed
- 3 sprigs fresh thyme and 1 bay leaf
📋 Instructions
- 1Dry and season the roast — Pat the chuck roast completely dry with paper towels, then rub it all over with 2 tsp kosher salt and 1 tsp black pepper. Let it sit at room temperature for 30 minutes while you prep the vegetables; this helps it cook evenly.
- 2Sear until deeply browned — Heat 2 tbsp oil in a Dutch oven over medium-high heat until it shimmers, about 350 F (175 C). Sear the roast 4 minutes per side until a dark mahogany crust forms, then transfer it to a plate.
- 3Soften the aromatics — Lower the heat to medium, add the onions and garlic, and cook 5 minutes until the onions turn translucent and the edges begin to caramelize. Stir in the tomato paste and cook 1 minute until it darkens and smells sweet.
- 4Deglaze with wine — Pour in the red wine and scrape the browned bits from the bottom with a wooden spoon. Simmer 3 minutes until the wine reduces by half and no longer smells of alcohol.
- 5Build the braise — Return the roast to the pot and add the beef broth, thyme, and bay leaf; the liquid should come halfway up the meat. Bring to a bare simmer, about 300 F (150 C), then cover and transfer to a 325 F (165 C) oven.
- 6Braise low and slow — Cook covered for 2 hours 30 minutes, until the beef reaches 200 F (93 C) internal temperature and a fork slides in with almost no resistance. Add the carrots and potatoes during the last 45 minutes so they hold their shape.
- 7Glaze and rest — Uncover, raise the oven to 425 F (220 C), and roast 15 minutes until the surface is burnished and the sauce bubbles at the edges. Rest the roast 20 minutes on a board before slicing against the grain.
- 8Finish the gravy — Strain the pan juices, skim the fat, and simmer 5 minutes until the gravy coats the back of a spoon. Whisk in cold butter off the heat, taste for salt, and spoon over the sliced roast.

Ingrid explores slow travel and cultural immersion, favoring off-season destinations and local experiences. She writes about the logistics of long-term stays and how to connect with communities without being a tourist. Her angle is about depth over distance.